In this step-by-step guide, the Bioinformatics data scientist will use Rafay’s end user portal to launch a well resourced remote VM and run a series of BioContainers with Docker.
Prerequisites
- Access to Rafay’s end user self-service portal (i.e. Developer Hub)
- An SSH client (e.g., PuTTY on Windows, Terminal on macOS/Linux)
- An SSH Public Key
Step 1: Launch a Remote VM
This step covers the creation and deployment of the remote VM using Rafay’s Developer Hub. Watch a brief video of the end user experience below.
-
- Navigate to Compute Instances:
- Log in to your Developer Hub. On the dashboard or navigation menu, find and click on “Compute Instances.
- Create a New Compute Instance:
- Click the “New Compute Instance” button.
- Navigate to Compute Instances:

-
- Select a Compute Profile:
- From the “Compute Profile” dropdown, choose a profile that meets your needs, for example, “VMAAS – Large (4 GPU)” if you require significant GPU resources.
- Configure Instance Details:
- Fill in the required details for your new VM
- Name: Enter a descriptive name (e.g.,
demo-vm-biocontainers). - Compute Profile: Confirm your selected profile (e.g.,
vmaas). - Workspace: Select your desired workspace (e.g.,
demo). - CPUs: Specify the number of CPUs (e.g.,
44 vCPUs). - Disk Storage (GB): Set the disk size (e.g.,
100 GB). - GPUs: Specify the number of GPUs (e.g.,
1 GPU). - Memory (MB): Set the memory allocation (e.g.,
130 GB). - Image: Choose the operating system image (e.g.,
Ubuntu 24.04).
- Name: Enter a descriptive name (e.g.,
- Note that the user can request substantial compute, memory, GPU, and storage resources that are not possible on end user laptops.
- Fill in the required details for your new VM
- Select a Compute Profile:

- Add SSH Public Key:
- Paste your SSH Public Key into the designated field.
- Note that this SSH key will be used to securely connect to the remote VM.
- Create and Publish the Instance:
- Click the “Create” or “Publish” button to initiate the VM deployment.
- Monitor Deployment Status:
- Observe the deployment status. It will typically transition through “Pending,” “In Progress,” and finally to “Success.”
- Once successful, note down the IP Address and Username displayed for your VM. These are crucial for connecting via SSH.
Step 2: Launch a BioContainer Using Docker on the Remote VM
This step details how to connect to your VM and run Docker commands to manage and execute BioContainers.
-
- Connect to Your Remote VM via SSH:
- Open your SSH client (e.g., Terminal on macOS/Linux, PuTTY on Windows).
- Use the ssh command with the Username and IP Address you noted earlier:
ssh [Username]@[IP_Address]
#Example: ssh ubuntu@192.0.2.1
- If prompted, accept the authenticity of the host.
- Verify Docker Installation:
- Once connected, ensure Docker is correctly installed by checking its version:
docker --version
- You should see output similar to
Docker version 24.0.5, build 24.0.5-0ubuntu1~22.04.1.
- Once connected, ensure Docker is correctly installed by checking its version:
- Create a Host Data Directory:
- Connect to Your Remote VM via SSH:
mkdir host-data
-
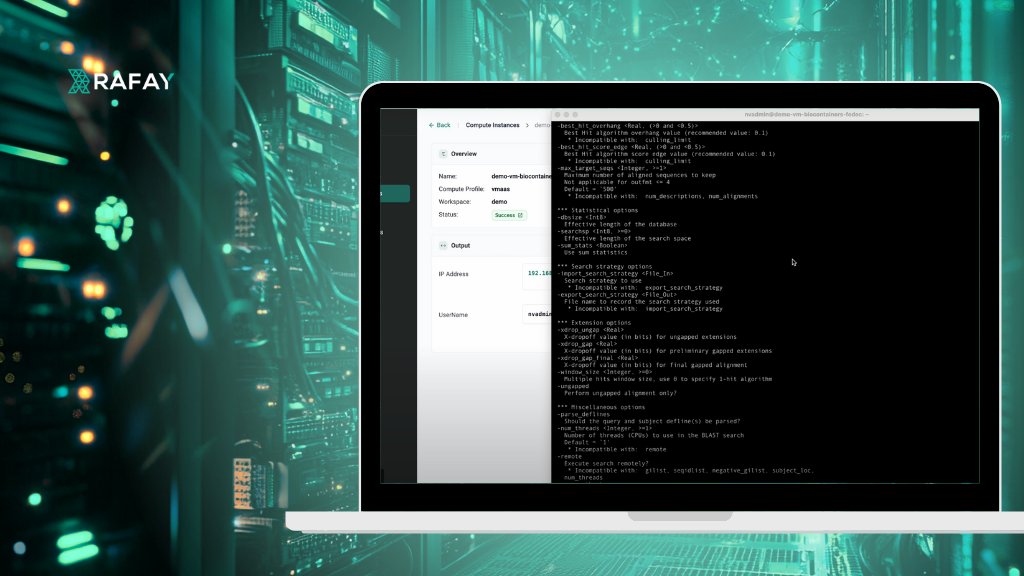
- Test Run a BioContainer (Get Help):
docker run biocontainers/blast:2.2.31 -help
- In this example, we are using BLAST, which is an acronym for Basic Local Alignment Search Tool.
- List Downloaded Docker Images:<l/i>
docker images
- BioContainer images can be large. This is another benefit of using a Remote VM for these operations.
- Download and Unzip Data for BLAST (using Docker):
-
docker run --rm -v $(pwd)/host-data:/host-data biocontainers/wget:1.20.3 wget -P /host-data https://ftp.ncbi.nlm.nih.gov/blast/executables/LATEST/blast-2.2.31-src.tar.gz
- The video used wget to download a .tar.gz file. For a direct example of downloading a protein FASTA, replace the URL with a publicly available protein FASTA file.
- Unzip the downloaded protein file:
docker run --rm -v $(pwd)/host-data:/host-data biocontainers/gzip:1.9 gzip -d /host-data/zebrafish.1.protein.faa.gz
- Verify Unzipped File:
-
ls host-data
You should see zebrafish.1.protein.faa.
- Build a BLAST Protein Database:
-
docker run --rm -v $(pwd)/host-data:/host-data biocontainers/blast:2.2.31 makeblastdb -in /host-data/zebrafish.1.protein.faa -dbtype prot -out /host-data/zebrafish_db
- Download a Query Protein File:
-
docker run --rm -v $(pwd)/host-data:/host-data biocontainers/wget:1.20.3 wget -P /host-data https://www.uniprot.org/uniprot/P04156.fasta
- Verify Query File Download:
-
ls host-data
You should now see
P04156.fastaand your database files. - Perform a BLAST Search:
-
docker run --rm -v $(pwd)/host-data:/host-data biocontainers/blast:2.2.31 blastp -query /host-data/P04156.fasta -db /host-data/zebrafish_db -out /host-data/results.txt
![docker_cmd]()

- View BLAST Results:
cat host-data/results.txt

Conclusion
In the previous blog, we reviewed how BioContainers represent a transformative leap forward for bioinformatics, offering unparalleled reproducibility, ease of use, and portability.
In this blog, we reviewed the steps data scientists can follow to successfully launch a remote VM, securely access it, and perform a basic bioinformatics task using BioContainers!
The post Get Started with BioContainers using Rafay appeared first on Rafay.